There are several concepts you need to understand in order to get the most out your images.
An inspection is an imaging session. An imaging session can have multiple imaging settings, i.e., you could have a single inspection during which a plate was imaged under both visible and UV light. Visible and UV are different types of imaging settings.
The main image viewing area is divided into Canvas, Well, Drop and Compare sub-tabs.
The Image Navigator is a tool at the bottom of the screen that will help you move through your images.
You can add a note to your images, draw on an image, measure objects in your images and set regions of interest on your images via Image Tools.
Scoring images is highly recommended, as it allows you to take advantage of Search and Filter, the Hit Report, and the Hit indicator in the tree once you have defined which scores indicate hits using General settings.
Image scheduling, imaging settings and management tasks are easily accessed from the Imaging node on the Explorer tree.
If an experiment has images, the experiment will automatically open to Image View when you open the plate. However, you can access images view at any time through the following methods:

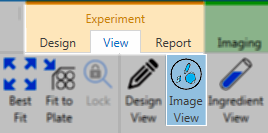
Image View button on Experiment contextual tab set

View Bar -- Image View Button Highlighted
When Rock Maker is in Images view, the Canvas tab will display one drop image for every well. For multi-drop plates, you can view use the Well tab while you move around your plate. These images are thumbnails of the original well images that give you a quick glimpse at the contents of the wells.
You can save the thumbnail view by right-clicking a well and selecting Save Thumbnail.
Note: When you switch to the Images view and the plate has an imaging setting associated with it, Rock Maker will show that imaging setting by default.